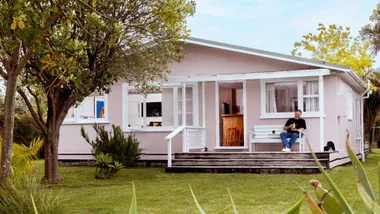
A former Auckland state house has been given stylish new lease of life following a thoughtful renovation. See how this family achieved their modern makeover
Meet and greet
Katie Wilson, architecture graduate, Steve Evans, clinical director of paediatric surgery, Luca, 9, and Harley, 6.
Problem
- The original foundations needed re-piling and the cement roof tiles were leaking.
- There wasn’t enough room to accommodate friends and family visiting from overseas, potentially for lengthy periods.
- Views of the Waitemata Harbour from the house were not being capitalised on.
Solution
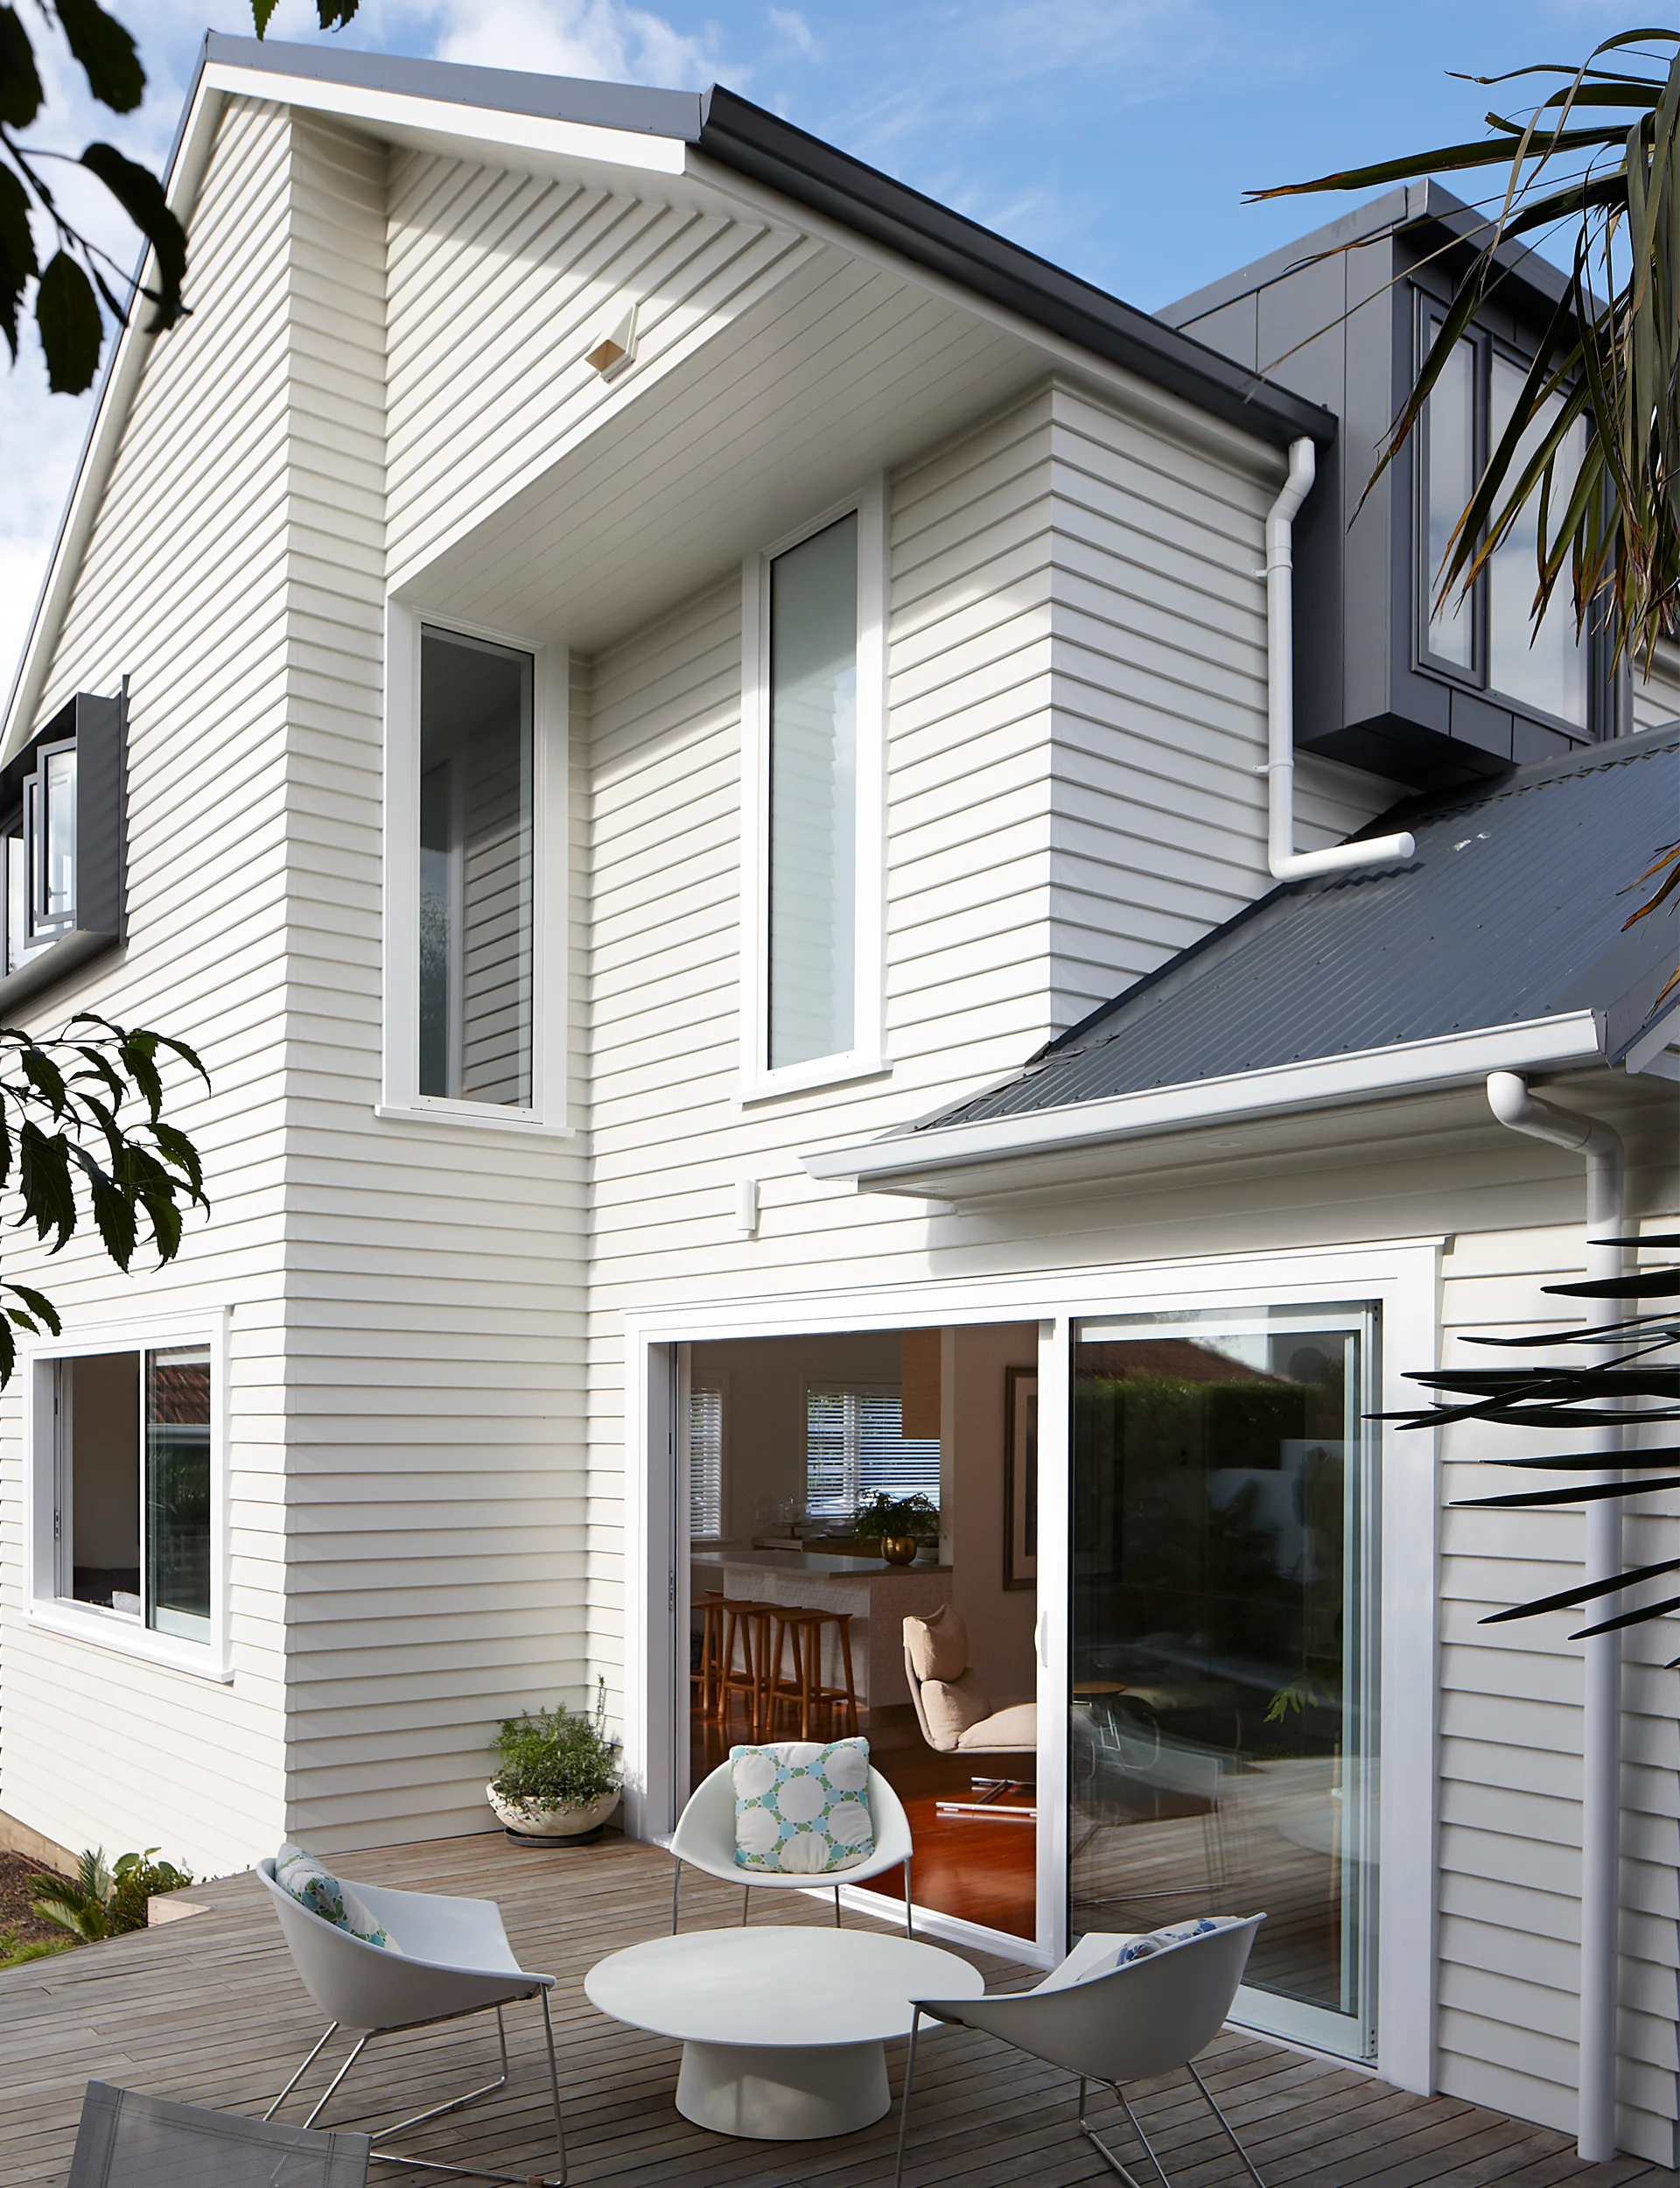
- The foundations were strengthened, allowing a second storey to be built on top of the former 1930s state home.
- The downstairs living space was reconfigured and increased and three bedrooms included on the upper level.
- Strategically placed windows now take full advantage of the views out to Rangitoto and beyond.
What parts of the house are you most proud of?
The stairwell: it’s a clever little dark grey box projecting out of the south gable. It allowed us to stay within the height-to-boundary envelope while creating a light-filled central stairwell. The reclaimed matai treads and the strong and unusual balustrade make it a huge statement when you enter the house. Also the eyebrow window: the master bedroom corner window has an aluminium ‘eyebrow’ which frames the window continuously on one side and acts as a solar shade.
[gallery_link num_photos=”9″ media=”https://www.yourhomeandgarden.co.nz//wp-content/uploads/sites/18/2018/05/Orakei4.jpg” link=”/inside-homes/home-features/state-house-renovation-auckland” title=”Read the full reno story here”]
Renovation tips
+ Live in the house for at least a year before you begin planning. You must understand the site, the house, the views and how the sun moves around the site all year.
+ Choose a designer and builder that you trust and get on well with. It becomes a very close relationship for a while and it’s vital that you really trust their advice.
+ While the budget is very important, sometimes short-term gains are lost because of issues down the track. The cheapest price may not necessarily be the best option.

Expert Q+A with Allan McKinstry – Project Manager, McKinstry Projects
What were some of the challenges you faced with this project?
- Because the original plans were slightly out with the height-to-boundary restrictions, we suggested Katie and Steve gauge their neighbours’ thoughts (and agreement in principle) at concept stage, before seeking resource consent. Katie made some slight alterations in response to one neighbour’s wishes but other than that the resource process was fairly straightforward.
- Historical (1930s) subsidence meant that parts of the original house were 80mm higher than the 2006 extension. We also wanted to retain the matai flooring. This meant that we had to re-level and re-pile, while protecting the original floor, by painstakingly hand-excavating under the house. We successfully levelled the floor, reducing the discrepancy to only about 20mm.
- Katie designed a balustrade that was a combination of old and new. It has a white-painted, recessed strip with LED lighting to highlight the recess. The handrail, however, has a traditional profile, as suggested by Joseph McKinstry. We had to make many mock-ups of how this recess and profile would neatly turn the corner at the landing. With good collaboration between Katie and the build team on site, we got a great result.
Budget
Total reno spend:
+ $720K (build $429K; fitout including new furniture $141K; pool, deck and rear landscaping $150K).
Fitout included:
+ Kitchen: Cabinetry, benchtop and splashback $36K, appliances $25K.
+ Dining: Carl Hansen Wishbone chairs $6500, Moooi Zio table $8K, Mattiazzi Osso stools $5200.
+ Lighting: Monmouth Glass Studio Dome pendants $3600, Lee Broom decanter pendants $1600.
+ Floor sanding (entire ground floor) and reclaimed matai for staircase $18K.
+ Three bathrooms: fixtures and fittings $18K, tiling $4K.
+ Carpet (upstairs bedrooms and hall) $6K.

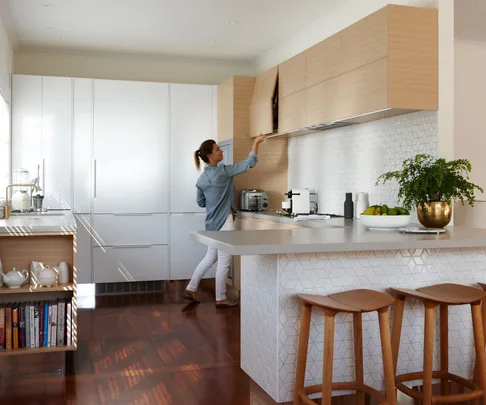
Wanting a “beautiful, mature” dining area for hosting dinner parties as well as family meals, Katie combined white walls and an oak table with dark greys, moody artwork and handblown glass lights.

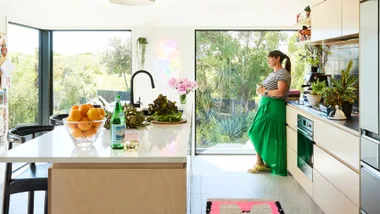
Katie’s cohesive colour palette naturally includes the kitchen, where tones of white, grey and bleached oak create a Scandinavian flavour.

The dining area was Katie’s favourite zone to decorate. The sophisticated space incorporates atmospheric art and handblown lighting yet is robust enough to be used by the whole family.

This home is simple, honest, uncomplicated and welcoming, nurturing the family who live here while simultaneously respecting its neighbours and its place in the country’s social history.

Although Katie was responsible for the architectural design, she got equal enjoyment from designing and decorating the interior.

The serene tones in this effortlessly simple scheme evoke feelings of cosiness and calm.

Boys’ bathroom A Lego-yellow tap and dispenser by Astra Walker add a dash of fun in Luca and Harley’s bathroom.

Katie has incorporated subtle design details throughout her home, such as the tiles in the downstairs bathroom which echo the angle and colour of the stairwell, while the room’s metallic elements pick up on the beautiful brass Max Gimblett quatrefoils on the staircase.

The deep jewel tone of Resene ‘San Juan’ generates a warm, luxe vibe. The oak and mirrored cabinetry were chosen to contrast with the dark wall while also bringing light and texture to the space.

Windows have played a huge part in Katie’s design.

Suppliers
+ Interior design
- By Katie, who now has her own business, Integritet Interiors, [email protected]
+ Builder
+ Landscape design and construction
+ Kitchen bathroom and ensuite tiles:
+ Carpet:
- Cavalier Bremworth Levante from Flooring Xtra
+ Ensuite floor:
- Limestone vinyl by Polyflor
Words by: Annick Larkin. Photography by: Jackie Meiring.
[related_articles post1=”78960″ post2=”78961″]
Related stories
Native ad body.
Native ad body.

Native ad body.